哇哈哈哈哈,今天拿到了全新刀片服务器的权限!就在这机器上来配置吧!!!
这将是一篇很长很长的文章。需要安装的包实在太多了。
我将一点一点的写,尽量细化到每一步。所以完成这篇博客需要的时间可能会比较长。
But, just rock it!
OK.开题了。众所周知,在Linux下安装PHP有几种方法,但是最好的还是自己下载所有的源码包,然后编译一个适合自己的环境(当然,也就可以用最新的东西,只要不版本冲突)。LAMP组合中每个成员都是开源的软件,都可以从各自的官方网站上免费下载安装程序的源代码文件,并在自己的系统上编译,编译之前会检查系统的环境,并可以针对目标系统的环境进行优化,所以和自己系统的兼容性是最好的,不仅如此,允许你根据自己的需求进行定制安装。
这是LAMP环境最理想的搭建方法,也是最复杂的安装方式。所以要搭建一个最完美的LAMP工作环境,多花费一些时间和精力在源代码包的安装上,还是值得的。
零. 好了,现在列一下所需要的包,是我搭配环境的时候用到的。有些是最新的,有些不是。
(下载地址下次补齐,今天准备回去了。)
1. httpd-2.4.4
官网:http://httpd.apache.org/download.cgi#apache24
2. mysql-5.6.10
官网:http://downloads.mysql.com/archives.php?p=mysql-5.6&v=5.6.11
3. php.5.3.22
官网:http://www.php.net/downloads.php
4. libxml2-2.6.30
官网:ftp://xmlsoft.org/libxml2/
5. libmcrypt-2.5.8
官网:http://mcrypt.hellug.gr/lib/
6. zlib-1.2.7
官网:http://www.zlib.net/
7. gd-2.0.35
官网:https://bitbucket.org/libgd/gd-libgd/downloads
8. autoconf-2.61
官网:http://ftp.gnu.org/gnu/autoconf/
9. freetype-2.3.5
官网:http://sourceforge.net/projects/freetype/files/
10. libpng-1.6.0
官网:http://www.libpng.org/pub/png/libpng.html
11. jpeg-6b
官网:http://www.ijg.org/
12. apr-1.4.6
官网:http://apr.apache.org/download.cgi
13. apr-util-1.4.1
官网(同上,是一个地址):http://apr.apache.org/download.cgi
14. pcre-8.32
官网:http://www.pcre.org/
15. libtool-2.2.6
官网:http://ftp.gnu.org/gnu/libtool/libtool-2.4.2.tar.gz
一. 先检测一下基本的系统环境信息
1.$ uname -a

2. 看一下gcc装了没有
$ gcc -v

果然没有(当然没有啦!!新机器!!哇卡卡卡卡卡卡卡!!),
$ sudo apt-get install gcc
下面开始正式编译源码包并安装。
二. 编译各个源码包并安装
2.1 安装libxml2最新库文件
2.1.1 在上面的链接或者网上下载 libxml2-2.6.30.tar.gz,放到/usr/local/src/目录下,解压软件包到当前目录libxml2-2.6.30下,并进入libxml2-2.6.30目录,命令如下:
$ cd /usr/local/usr/ // 进入源码包所在目录
$ sudo tar zxvf libxml2-2.6.30.tar.gz // 解压缩
$ cd libxml2-2.6.30/ // 进入目录
2.1.2 使用“configure”命令检查并配置安装需要的系统环境,并生成安装配置文件,命令行如下:
$ ./configure –prefix=/usr/local/libxml2
选项–prefix=/usr/local/libxml2作用,是在安装时将软件安装到/usr/local/libxml2目录下
执行成功后,会看见Done configuring的提示,如下图所示。

2.1.3 使用make命令编译源码文件并生成安装文件,命令如下:
$ make // 编译
出现错误:In function ‘open’,inlined from ‘xmlNanoHTTPSave__internal_alias’ at nanohttp.c:1588:12:
/usr/include/x86_64-linux-gnu/bits/fcntl2.h:51:24: error: call to ‘__open_missing_mode’ declared with attribute error: open with O_CREAT in second argument needs 3 arguments
解决方法:http://keping.me/2013-3-12/
2.1.4 使用make install命令进行安装,命令如下:
$ make install // 安装
如果安装成功以后,在/usr/local/libxml2/目录下将生成bin、include、lib、man和share五个目录。

*在后面安装PHP5源代码包的配置时,会通过在configure命令的选项中加上
“–with-libxml-dir=/usr/ local/libxml2“选项,用于指定安装libxml2库文件的位置
2.2 安装libmcrypt最新库文件
2.2.1 在上面的链接或者网上下载 libmcrypt-2.5.8.tar.gz,放到/usr/local/src/目录下,解压软件包到当前目录libxml2-2.6.30下,并进入libxml2-2.6.30目录,命令如下:
$ cd /usr/local/usr/ // 进入源码包所在目录
$ sudo tar zxvf libmcrypt-2.5.8.tar.gz // 解压缩
$ cd libmcrypt-2.5.8 // 进入目录
2.2.2 使用“configure”命令检查并配置安装需要的系统环境,并生成安装配置文件,命令行如下:
$ ./configure –prefix=/usr/local/libmcrypt
选项–prefix=/usr/local/libmcrypt作用,是在安装时将软件安装到/usr/local/libmcrypt目录下
这里需要系统安装了g++,如果没有提前安装g++,那就先sudo apt-get install g++吧,我这新服务器就没有装。
2.2.3 使用make命令编译源码文件并生成安装文件,命令如下:
$ make // 编译
2.2.4 使用make install命令进行安装,命令如下:
$ make install // 安装
如果安装成功就会在/usr/local/libmcrypt/目录下生成bin、include、lib、man和share五个目录。

*在后面安装PHP5源代码包的配置时,会通过在configure命令的选项中加上
“–with-mcrypt-dir=/usr/local/libmcrypt”选项,指定这个libmcrypt库文件的位置。
2.2.5 安装libltdl库。
安装完成libmcrypt库以后,进入到解压缩的目录/usr/local/src/ libmcrypt-2.5.8下,找到libltdl库源代码文件所在的目录libltdl,进入这个目录,按照下面几个命令配置、编译、安装就可以了。命令如下:
$ cd /usr/local/src/libmcrypt-2.5.8/libltdl // 进入软件源代码目录
$ ./configure –enable-ltdl-install // 配置ltdl库的安装
$ make // 编译
$ make install // 安装
安装完成后,会在/usr/local/include/目录下发现 ltdl.h头文件,如下图所示。

2.3 安装zlib最新库文件
2.3.1 在上面的链接或者网上下载 zlib-1.2.7.tar.gz,放到/usr/local/src/目录下,解压软件包到当前目录zlib-1.2.7/下,并进入zlib-1.2.7目录,命令如下:
$ cd /usr/local/usr/ // 进入源码包所在目录
$ sudo tar zxvf zlib-1.2.7.tar.gz // 解压缩
$ cd zlib-1.2.7/ // 进入目录
2.3.2 使用“configure”命令检查并配置安装需要的系统环境,并生成安装配置文件,命令行如下:
$ ./configure –prefix=/usr/local/zlib
选项–prefix=/usr/local/zlib作用,是在安装时将软件安装到/usr/local/zlib目录下
2.3.3 使用make命令编译源码文件并生成安装文件,命令如下:
$ make // 编译
2.3.4 使用make install命令进行安装,命令如下:
$ make install // 安装
如果安装成功就会在/usr/local/zlib/目录下生成include、lib和share三个目录。如下图

*在后面安装PHP5源代码包的配置时,会通过在configure命令的选项中加上
“–with-zlib-dir=/usr/local/zlib”选项,指定这个zlib库文件的位置。
2.4 安装libpng最新库文件
2.4.1 在上面的链接或者网上下载 libpng-1.6.0.tar.gz,放到/usr/local/src/目录下,解压软件包到当前目录libpng-1.6.0下,并进入libpng-1.6.0目录,命令如下:
$ cd /usr/local/usr/ // 进入源码包所在目录
$ sudo tar zxvf libpng-1.6.0.tar.gz // 解压缩
$ cd libpng-1.6.0/ // 进入目录
2.4.2 使用“configure”命令检查并配置安装需要的系统环境,并生成安装配置文件,命令行如下:
$ ./configure –prefix=/usr/local/libpng
选项–prefix=/usr/local/libpng作用,是在安装时将软件安装到/usr/local/libpng目录下
出现错误:configure: error: zlib not installed
解决方法(我很讨厌这个方法其实,但研究几天未果):http://keping.me/2013-3-12-2/
2.4.3 使用make命令编译源码文件并生成安装文件,命令如下:
$ make // 编译
2.4.4 使用make install命令进行安装,命令如下:
$ make install // 安装
如果安装成功就会在/usr/local/libpng目录下生成bin、include、lib和share四个目录。如下图

*在后面安装GD2库配置时,会通过在configure命令的选项中加上
“–with-png-dir=/usr/local/libpng”选项,指定这个libpng库文件的位置。
2.5 安装jpeg6最新库文件
2.5.1 在上面的链接或者网上下载 jpegsrc.v6b.tar.gz,放到/usr/local/src/目录下,解压软件包到当前目录jpeg-6b下,并进入jpeg-6b目录,命令如下:
$ cd /usr/local/usr/ // 进入源码包所在目录
$ sudo tar zxvf jpegsrc.v6b.tar.gz // 解压缩
$ cd jpeg-6b/ // 进入目录
2.5.2 安装GD2库前所需的jpeg6库文件,需要自己手动地创建安装需要的目录,它们在安装时不能自动创建。命令行如下:
$ sudo mkdir /usr/local/jpeg6 // 建立jpeg6软件安装目录
$ sudo mkdir /usr/local/jpeg6/bin // 建立存放命令的目录
$ sudo mkdir /usr/local/jpeg6/lib // 创建jpeg6库文件所在目录
$ sudo mkdir /usr/local/jpeg6/include // 建立存放头文件目录
$ sudo mkdir -p /usr/local/jpeg6/man/man1 // 建立存放手册的目录
2.5.3 使用“configure”命令检查并配置安装需要的系统环境,并生成安装配置文件,命令行如下(为了直观,使用“\”将一个命令换成多行):
$ sudo ./configure \
> –prefix=/usr/local/jpeg6/ \ // 安装时将软件安装到/usr/local/jpeg6目录下
> –enable-shared \ // 建立共享库使用的GNU的libtool
> –enable-static // 建立静态库使用的GNU的libtool
2.5.4 使用make命令编译源码文件并生成安装文件,命令如下:
$ make // 编译
出现错误:
./libtool –mode=compile gcc -O2 -I. -c ./jcapimin.c
make: ./libtool: Command not found
make: *** [jcapimin.lo] Error 127
解决方法:http://keping.me/2013-4-12/
2.5.5 使用make install命令进行安装,命令如下:
$ make install // 安装
*在后面安装GD2库配置时,会通过在configure命令的选项中加上
“–with-jpeg-dir=/usr/local/jpeg6”选项,指定这个jpeg库文件的位置。
至此,我们已经使用了如下图所示的这么多的安装包~~休息一下先。

2.6 安装freetype最新库文件
2.6.1 在上面的链接或者网上下载 freetype-2.3.5.tar.gz,放到/usr/local/src/目录下,解压软件包到当前目录freetype-2.3.5下,并进入freetype-2.3.5目录,命令如下:
$ cd /usr/local/usr/ // 进入源码包所在目录
$ sudo tar zxvf freetype-2.3.5.tar.gz // 解压缩
$ cd freetype-2.3.5/ // 进入目录
2.6.2 使用“configure”命令检查并配置安装需要的系统环境,并生成安装配置文件,命令行如下:
$ ./configure –prefix=/usr/local/freetype
选项–prefix=/usr/local/freetype作用,是在安装时将软件安装到/usr/local/freetype目录下
2.6.3 使用make命令编译源码文件并生成安装文件,命令如下:
$ make // 编译
2.6.4 使用make install命令进行安装,命令如下:
$ make install // 安装
如果安装成功就会在/usr/local/freetype目录下生成bin、include、lib和share四个目录。如下图

*在后面安装GD2库配置时,会通过在configure命令的选项中加上
“–with-freetype-dir=/usr/local/freetype”选项,指定这个freetype库文件的位置。
2.7 安装autoconf最新库文件
2.7.1 在上面的链接或者网上下载 autoconf-2.61.tar.gz,放到/usr/local/src/目录下,解压软件包到当前目录autoconf-2.61下,并进入autoconf-2.61目录,命令如下:
$ cd /usr/local/usr/ // 进入源码包所在目录
$ sudo tar zxvf autoconf-2.61.tar.gz // 解压缩
$ cd autoconf-2.61/ // 进入目录
2.7.2 使用“configure”命令检查并配置安装需要的系统环境,并生成安装配置文件,命令行如下:
$ ./configure
出现错误:configure: error: GNU M4 1.4 is required
解决方法:$ sudo apt-get install m4
2.7.3 使用make命令编译源码文件并生成安装文件,命令如下:
$ make // 编译
2.7.4 使用make install命令进行安装,命令如下:
$ make install // 安装
2.8 安装GD最新库文件
2.8.1 在上面的链接或者网上下载 gd-2.0.35.tar.gz,放到/usr/local/src/目录下,解压软件包到当前目录gd-2.0.35下,并进入gd-2.0.35目录,命令如下:
$ cd /usr/local/usr/ // 进入源码包所在目录
$ sudo tar zxvf gd-2.0.35.tar.gz // 解压缩
$ cd gd-2.0.35/ // 进入目录
2.8.2 使用“configure”命令检查并配置安装需要的系统环境,并生成安装配置文件,命令行如下(为了直观,使用“\”将一个命令换成多行):
$ sudo ./configure \
> –prefix=/usr/local/gd2/ \ // 安装时将软件安装到/usr/local/gd2目录下
> –with-zlib=/usr/local/zlib/ \ // 指定到哪去找zlib库文件的位置
> –with-jpeg=/usr/local/jpeg6/ \ // 指定到哪去找jpeg6库文件的位置
> –with-png=/usr/local/libpng/ \ // 指定到哪去找libpng库文件的位置
> –with-freetype=/usr/local/freetype/ // 指定到哪去找freetype 2.x字体库的位置
2.8.3 使用make命令编译源码文件并生成安装文件,命令如下:
$ make // 编译
出现错误:gd_png.c:16:53: fatal error: png.h: No such file or directory
解决方法:http://keping.me/2013-3-13/
2.8.4 使用make install命令进行安装,命令如下:
$ make install // 安装
如果安装成功就会在/usr/local/gd2目录下生成bin、include和lib三个目录。如下图

*在后面安装PHP5源代码包的配置时,会通过在configure命令的选项中加上
“–with-gd=/usr/ local/gd2/“选项,用于指定安装GD库文件的位置
2.9 安装新版本的Apache服务器
2.9.1 在上面的链接或者网上下载 httpd-2.4.4.tar.gz,放到/usr/local/src/目录下,解压软件包到当前目录 httpd-2.4.4下,并进入 httpd-2.4.4目录,命令如下:
$ cd /usr/local/usr/ // 进入源码包所在目录
$ sudo tar zxvf httpd-2.4.4.tar.gz // 解压缩
$ cd httpd-2.4.4/ // 进入目录
2.9.2 使用“configure”命令检查并配置安装需要的系统环境,并生成安装配置文件,命令行如下(为了直观,使用“\”将一个命令换成多行):
$ sudo ./configure \
> –prefix=/usr/local/apache2 \ // 指定Apache软件安装的位置
> –sysconfdir=/etc/httpd \ // 指定Apache服务器的配置文件存放位置
> –with-z=/usr/local/zlib/ \ // 指定zlib库文件的位置
> –with-included-apr \ // 使用捆绑APR/APR-Util的副本
> –disable-userdir \ // 请求的映象到用户特定目录
> –enable-so \ // 以动态共享对象(DSO)编译
> –enable-deflate=shared \ // 缩小传输编码的支持
> –enable-expires=shared \ // 支持头文件过期控制
> –enable-rewrite=shared \ // 基于规则的URL操控
> –enable-static-support // 建立一个静态链接版本的支持
出现错误:configure: error: Bundled APR requested but not found at ./srclib/. Download and unpack the corresponding apr and apr-util packages to ./srclib/.
解决方法:http://keping.me/2013-3-13-2/
2.9.3 使用make命令编译源码文件并生成安装文件,命令如下:
$ make // 编译
2.9.4 使用make install命令进行安装,命令如下:
$ make install // 安装
如果安装成功就会在/usr/local/apache2目录下生成bin、build、cgi-bin、error、htdocs、icons、include、lib、logs、man、manual和modules十二个目录,如下图。

2.9.5 启动Apache服务器,命令如下:
$ sudo /usr/local/apache2/bin/apachectl start
出现错误:AH00558: httpd: Could not reliably determine the server’s fully qualified domain name, using 127.0.1.1. Set the ‘ServerName’ directive globally to suppress this message
解决方法:修改httpd.conf配置文件,由于我们配置安装Apache服务器的时候,指定的配置文件放在了/etc/httpd目录下,如下图

我们需要去修改这个文件,命令如下:
$ sudo vim /etc/httpd/httpd.conf
找到ServerName所在的地方,如下图所示

在这下面添加一行ServerName localhost,如下图所示

重新启动Apache服务器即可,命令如下:
sudo /usr/local/apache2/bin/apachectl restart
通过查看进程的方式,查看是否启动成功,命令如下:
$ ps -ef | grep httpd
如果看到许多(一般是4到5个)输出就说明对了,如下图:

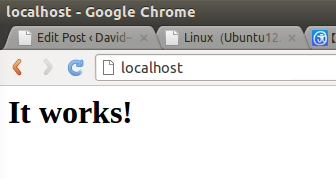
也可以通过在浏览器输入localhost,查看是否启动成功,如果成功,会有下图效果:
2.9.6 添加开机自启动
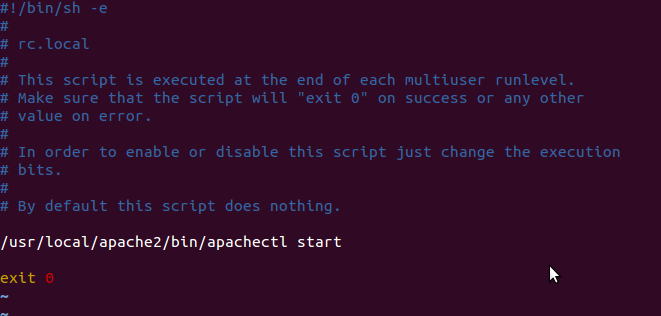
每种服务器软件都有必要制作成开机时自启动,Apache服务器开机自启动,只要在“/etc/rc.local”文件中,加上Apache服务器的启动命令即可,命令如下:
$ sudo vim /etc/rc.local
加上启动命令,如下图所示。
2.10 安装Mysql
2.10.1 在上面的链接或者网上下载 mysql-5.6.10.tar.gz,放到/usr/local/src/目录下,解压软件包到当前目录 mysql-5.6.10下,并进入 mysql-5.6.10目录,命令如下:
$ cd /usr/local/usr/ // 进入源码包所在目录
$ sudo tar zxvf mysql-5.6.10.tar.gz // 解压缩
$ cd mysql-5.6.10/ // 进入目录
2.10.2 安装cmake。由于mysql貌似从5.5已经不用./configure来配置了,换成了cmake,所以需要安装cmake,检测系统中是否有cmake,命令如下:
$ cmake -version
如果没看到类似下图的输出

则需要自己先安装一下,命令如下:
$ sudo apt-get install cmake
2.10.3 新增用户组,命令如下:
$ sudo groupadd mysql
2.10.4 新增用户,命令如下:
$ sudo useradd mysql -g mysql
2.10.5 新建数据库执行文件目录,命令如下:
$ sudo mkdir -p /usr/local/mysql
2.10.6 新建数据库数据文件目录,命令如下:
$ sudo mkdir -p /db/mysql/data
2.10.7 修改目录拥有者,命令如下:
$ sudo chown -R mysql:mysql /usr/local/mysql
$ sudo chown -R mysql:mysql /db/mysql/data
$ sudo chown -R mysql:mysql /usr/local/mysql/.
$ sudo chown -R mysql:mysql /db/mysql/data/.
2.10.8 使用cmake进行配置,命令如下:
cmake \
-DCMAKE_INSTALL_PREFIX=/usr/local/mysql \
-DMYSQL_UNIX_ADDR=/usr/local/mysql/mysql.sock \
-DDEFAULT_CHARSET=utf8 \
-DDEFAULT_COLLATION=utf8_general_ci \
-DWITH_MYISAM_STORAGE_ENGINE=1 \
-DWITH_INNOBASE_STORAGE_ENGINE=1 \
-DWITH_ARCHIVE_STORAGE_ENGINE=1 \
-DWITH_BLACKHOLE_STORAGE_ENGINE=1 \
-DWITH_MEMORY_STORAGE_ENGINE=1 \
-DWITH_READLINE=1 \
-DENABLED_LOCAL_INFILE=1 \
-DMYSQL_DATADIR=/db/mysql/data \
-DMYSQL_USER=mysql \
-DMYSQL_TCP_PORT=3306
出现错误:CMake Error at cmake/readline.cmake:83 (MESSAGE):
Curses library not found. Please install appropriate package,
remove CMakeCache.txt and rerun cmake.On Debian/Ubuntu, package name is libncurses5-dev, on Redhat and derivates it is ncurses-devel.
Call Stack (most recent call first):
cmake/readline.cmake:126 (FIND_CURSES)
cmake/readline.cmake:193 (MYSQL_USE_BUNDLED_LIBEDIT)
CMakeLists.txt:325 (MYSQL_CHECK_READLINE)
解决办法:按照提示,既然少ncurses包,那就安装一下,命令如下:
$ sudo apt-get install libncurses5-dev
然后把当前目录下这个缓存文件删除,命令如下:
$ sudo rm CMakeCache.txt
然后,重新用cmake进行配置,复制上面的命令即可。
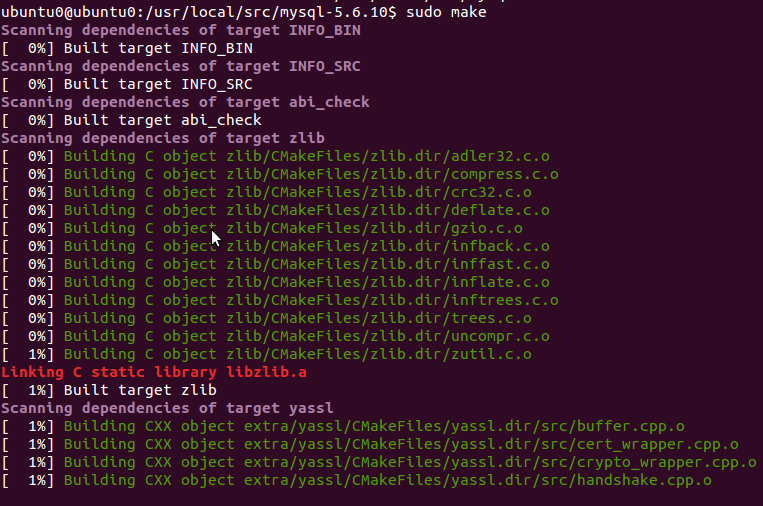
2.10.9 使用make命令编译源码文件并生成安装文件,命令如下:
$ make // 编译
可能会花比较长的时间编译
2.10.10 使用make install命令进行安装,命令如下:
$ make install // 安装
2.10.11 复制配置文件,命令如下:
$ sudo cp /usr/local/mysql/support-files/my-default.cnf /etc/my.cnf
2.10.12 进入安装路径,命令如下:
$ cd /usr/local/mysql
2.10.13 执行配置脚本,命令如下:
$ sudo ./scripts/mysql_install_db –user=mysql –datadir=/db/mysql/data
2.10.14 复制服务启动脚本,命令如下:
$ sudo cp /usr/local/mysql/support-files/mysql.server /etc/init.d/mysql
2.10.15 启动MySQL服务,命令如下:
$ sudo service mysql start
2.10.16 设置root密码,命令如下:
$ sudo /usr/local/mysql/bin/mysqladmin -u root password 123456
即新密码设置为来123456
2.10.17 设置开机自启动,命令如下:
$ sudo update-rc.d mysql defaults
2.10.18 设置mysql为系统命令,命令如下:
$ sudo ln -s /usr/local/mysql/bin/* /bin/
以后你在系统下直接执行:
$ mysql -u root -p
就可以登录了。
2.10.19 设置访问权限。
在MySQL安装过程中,使用mysql_install_db程序安装了MySQL数据库授权表,表定义了初始MySQL用户账户和访问权限,所有初始账户均没有密码。这些账户为超用户账户,可以执行任何操作。初始root账户的密码为空,因此任何人可以用root账户不用任何密码来连接MySQL服务器,并具有所有权限,这意味着MySQL安装未受保护。如果你想要防止客户端不使用密码用匿名用户来连接,你应当为匿名账户指定密码或删掉匿名账户,应当为MySQL root账户指定密码。使用“mysql –u root”启动MySQL客户端控制台,连接MySQL服务器。命令行如下:
$ mysql -u root -p
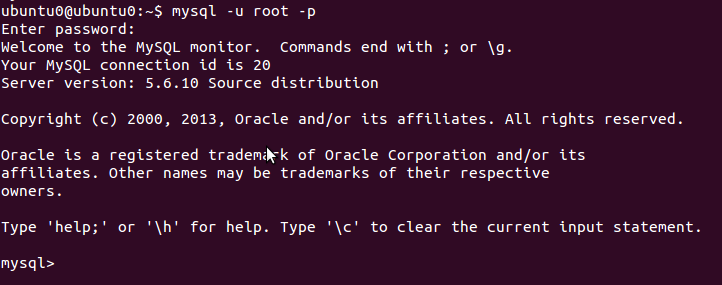
然后用刚才的密码123456登录,接着执行:
mysql> DELETE FROM mysql.user WHERE Host=’localhost’ AND User=”;
Query OK, 1 rows affected (0.08 sec)
mysql> FLUSH PRIVILEGES;
Query OK, 1 rows affected (0.01 sec)
mysql的安装配置到此结束,,,,,,,,,,呼~~~~~~~~~~~
2.11 安装最新版本的PHP
2.11.1 在上面的链接或者网上下载php-5.3.22.tar.gz,放到/usr/local/src/目录下,解压软件包到当前目录php-5.3.22下,并进入php-5.3.22目录,命令如下:
$ cd /usr/local/usr/ // 进入源码包所在目录
$ sudo tar zxvf php-5.3.22.tar.gz // 解压缩
$ cd php-5.3.22/ // 进入目录
2.11.2 使用“configure”命令检查并配置安装需要的系统环境,并生成安装配置文件,命令行如下(为了直观,使用“\”将一个命令换成多行):
$ sudo ./configure \
> –prefix=/usr/local/php \ // 设置PHP5 的安装路径
> –with-config-file-path=/usr/local/php/etc \ // 指定PHP5配置文件存入的路径
> –with-apxs2=/usr/local/apache2/bin/apxs \ // 告诉PHP查找Apache 2的地方
> –with-mysql=/usr/local/mysql/ \ // 指定MySQL的安装目录
> –with-libxml-dir=/usr/local/libxml2/ \ // 告诉PHP放置libxml2库的地方
> –with-png-dir=/usr/local/libpng/ \ // 告诉PHP放置libpng库的地方
> –with-jpeg-dir=/usr/local/jpeg6/ \ // 告诉PHP放置jpeg库的地方
> –with-freetype-dir=/usr/local/freetype/ \ // 告诉PHP放置freetype库的地方
> –with-gd=/usr/local/gd2/ \ // 告诉PHP放置gd库的地方
> –with-zlib-dir=/usr/local/zlib/ \ // 告诉PHP放置zlib库的地方
> –with-mcrypt=/usr/local/libmcrypt/ \ // 告诉PHP放置libmcrypt库的地方
> –with-mysqli=/usr/local/mysql/bin/mysql_config \ // 变量激活新增加的MySQLi功能
> –enable-soap \ // 变量激活SOAP和Web services支持
> –enable-mbstring=all \ // 使多字节字符串支持
> –enable-sockets // 变量激活socket通信特性
(如果下载的是php5.5.4 ,可能会出现错误:/php-5.5.1/ext/gd/gd.c:1330: undefined reference to `XpmLibraryVersion’
只需要加上–with-xpm-dir=/usr/lib/x86_64-linux-gnu/ 即可。)
2.11.3 使用make命令编译源码文件并生成安装文件,命令如下:
$ make // 编译
2.11.4 使用make install命令进行安装,命令如下:
$ make install // 安装
2.11.5 建立配置文件,在使用configure命令安装配置时使用了“–with-config-file-path=/usr/local/php/etc/”选项,指定了配置文件的位置。将源码包目录下的“php.ini- dist”文件复制到指定的目录“/usr/local/php/etc/”中,并改名为“php.int”即可。命令如下:
$ sudo cp php.ini-dist /usr/local/php/etc/php.ini // 创建配置文件
2.11.6 整合Apache与PHP。上面PHP编译之前,我们使用configure命令安装配置时,使用了“–with-apxs2=/usr/local/apache2/bin/apxs”选项以使Apache 2将PHP作为功能模块使用。但我们还需要修改Apache配置文件,添加PHP的支持,告诉Apache将哪些后缀作为PHP解析。例如,让Apache把.php或.phtml后缀的文件解析为PHP。使用vim打开Apache的配置文件/etc/httpd/httpd.conf,找到“AddType application/x-gzip .gz .tgz”指令项,并在其下方添加一条指令“Addtype application/x-httpd- php .php .phtml”。也可以将任何后缀的文件解析为PHP,只要在添加的语句中加入并用空格分开,这里以多添加一个.phtml来示例。如下所示。
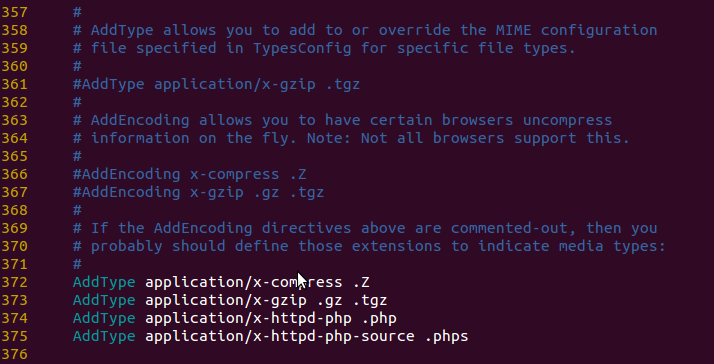
添加最后一条“AddType application/x-httpd-php-source .phps”是为了将 .phps 作为 PHP 的源文件进行语法高亮显示
2.11.7 重启Apache服务器,重启以后才能重新加载配置文件使修改生效。命令如下:
$ sudo /usr/local/apache2/bin/apachectl stop // 停止Apache服务
$ sudo /usr/local/apache2/bin/apachectl start // 开启Apache服务
2.11.8 测试PHP环境是否可以正常运行,在/usr/local/apache2/htdocs目录下建一个phpinfo目录,在phpinfo目录下新建一个index.php的文件,在该php文件中添加如下代码:
<?php
phpinfo();
?>
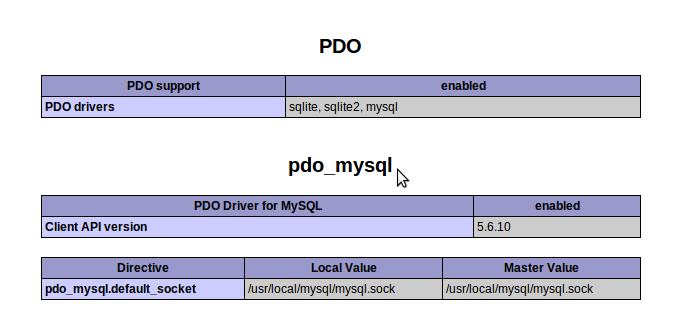
打开浏览器,在地址栏中输入URL为http://localhost/phpinfo/index.php来运行该文件,如果出现如下图所示的内容表示LAMP环境安装成功。
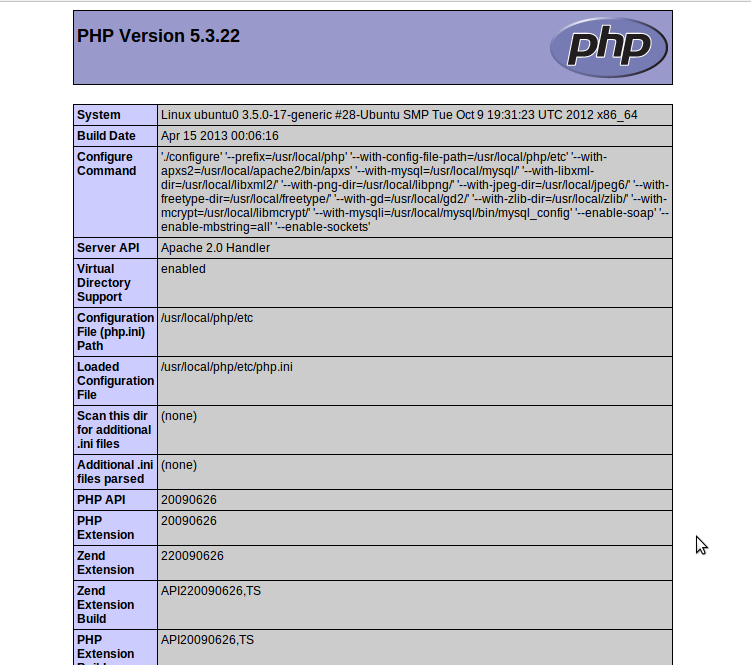
上例中使用了phpinfo()函数,作用是输出有关PHP当前状态的大部分信息内容,这包括关于PHP的编译和扩展信息、PHP版本、服务器信息和环境、PHP的环境、操作系统信息、路径、主要的和本地配置选项的值、HTTP头信息和PHP的许可等。因为每个系统的安装不同,phpinfo()函数可以用于检查某一特定系统配置设置和可用的预定义变量等。它也是一个宝贵的调试工具,因为它包含了所有EGPCS(Environment,GET,POST,Cookie,Server)数据。
三. I’M FUCKING DONE IT!!!!!!!!!!

