本文用以下五个步骤来详细介绍:
1. 用gii创建所需Module, Model, Controller,Crud以及Form
2. 注册界面显示部分(以下则以access模块作为例子讲解)
一. 用gii创建所需Module, Model, Controller,Crud以及Form
在浏览器输入地址http://127.0.0.1/icampus/sns/index.php?r=gii进入gii界面,输入密码123456,进入可视化代码生成工具页面。按照module -> model -> controller -> crud -> form 的顺序分别生成代码。
1.选择Module Generator,在Module ID输入框中输入模块名称access(为了演示这里输入的是access2,以后类同),点击Preview,确认没错以后点击Generate即可生成代码。
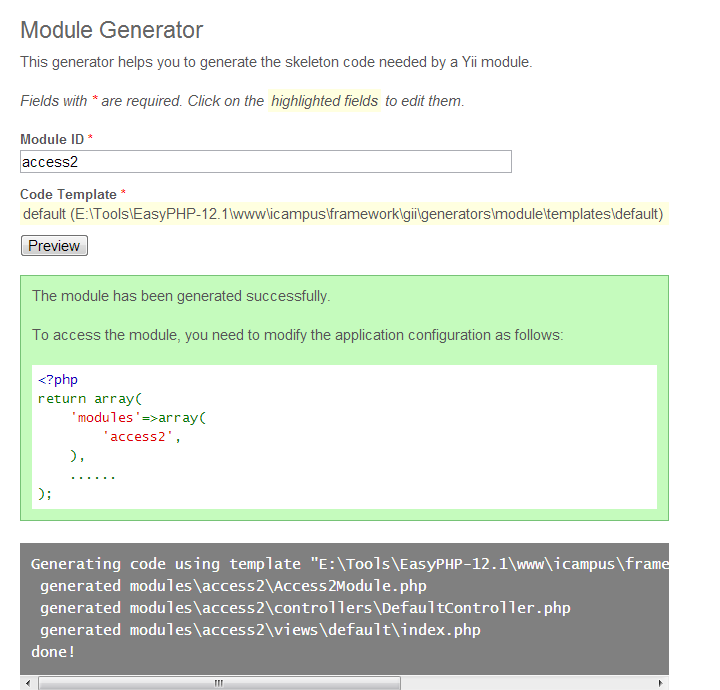
然后可以在icampus\sns\protected\modules文件夹下看到生成的access2文件夹。
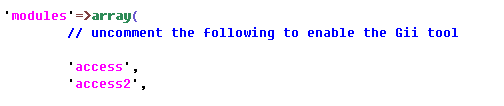
2.把上图中代码部分添加到\icampus\sns\protected\config\main.php中的modules数组里面,以便可以访问,如下图所示。
3. 点击Model Generator,参照下图的输入,填入所需内容,如表名前缀icp_access;注册所需要用的表示user,所以Table Name这里填入icp_access_user;Model Class可自定义,不妨用AccessUser2来创建;然后输入正确的Model Path。
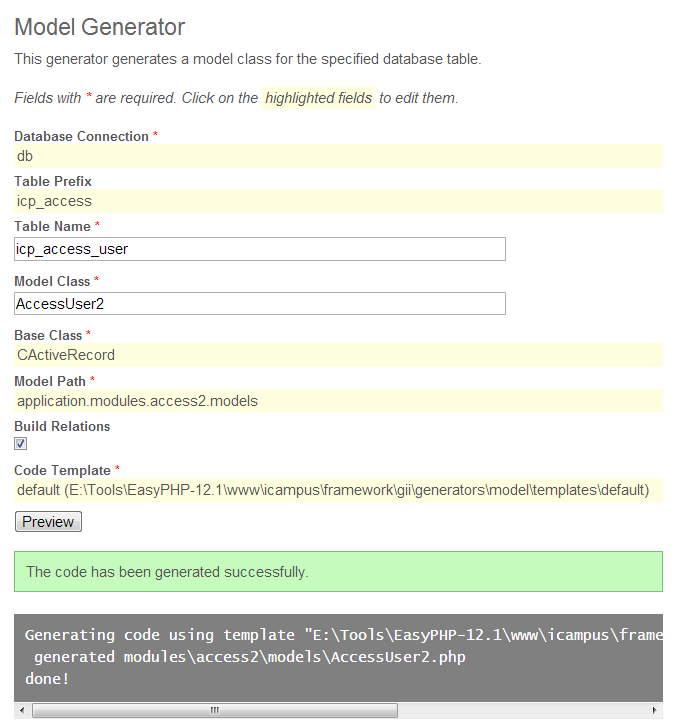
至此model也建立好了,可以在icampus\sns\protected\modules\access2文件夹下看到多出来一个model文件夹,里面有model文件AccessUser2.php
4. 点击Controller Generator,参照下图所示,填写具体输入框。Controller ID这里填写module名称/model名称,即access2/AccessUser2
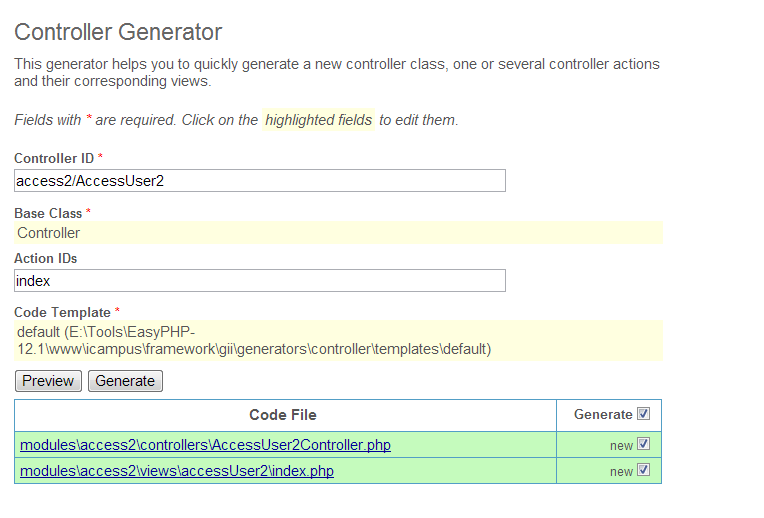
然后点击Generate,即会在模块的controller文件夹(icampus\sns\protected\modules\access2\controllers)下生成AccessUser2Controlller.php
5. 点击Crud Generator,参考下图填写
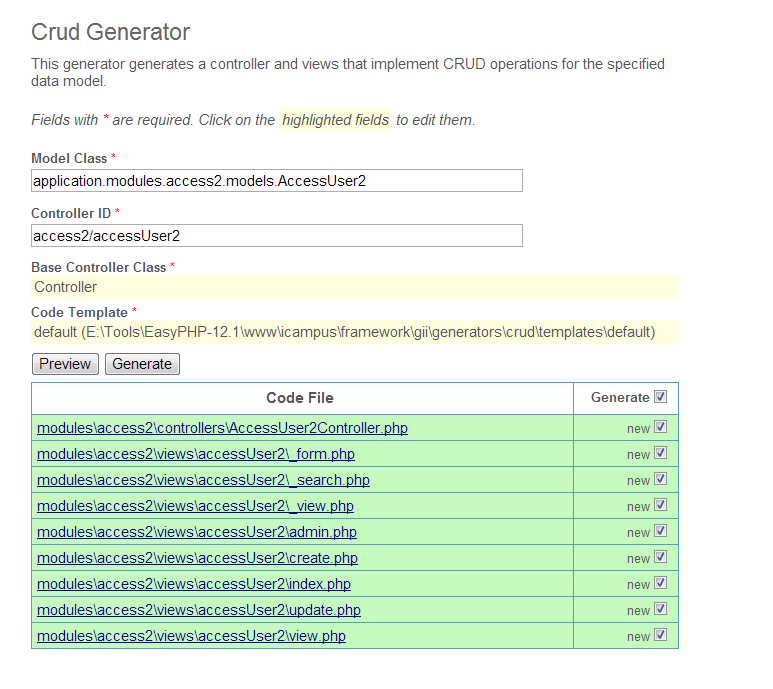
然后点击Generate即可
6. 点击Form Generator,参考下图填写各个输入框
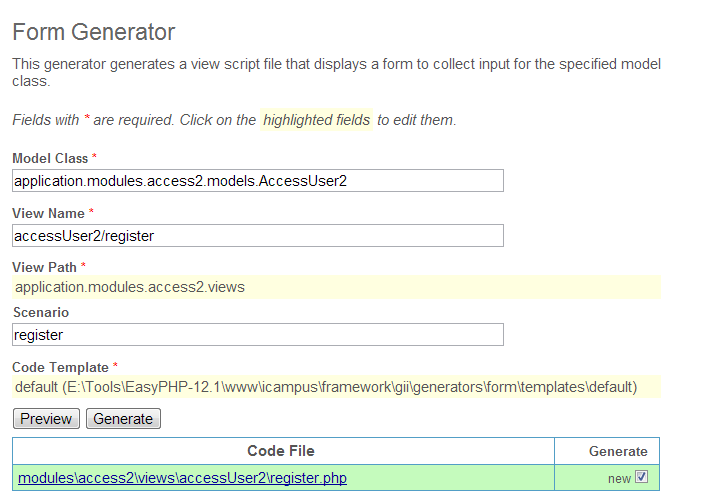
点击Generate即可生成所需要的form页面。然后会提示将下列代码添加到controller中。
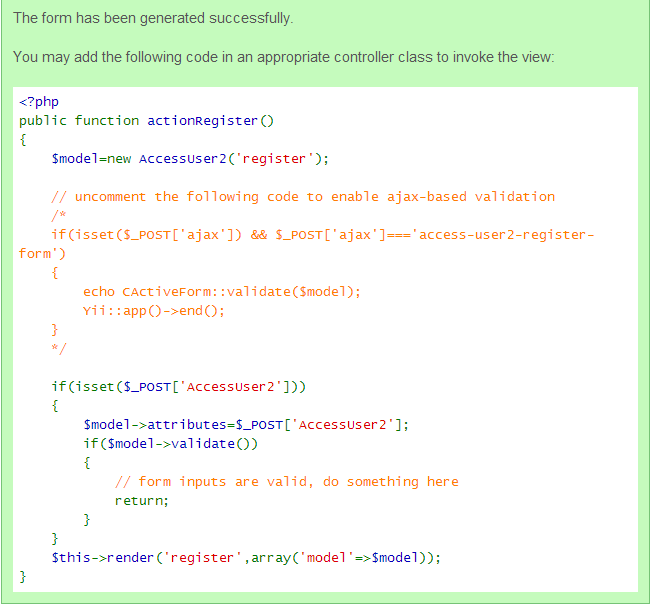
打开AccessUser2Controlller.php,将上述方法复制进去即可。
至此,注册模块所有需要自动生成的步骤已经完成。注意:最好按顺序来(module -> model -> controller -> crud -> form)
二. 注册界面显示部分(以下则以access模块作为例子讲解)
1.由于数据库中字段如lastlogin, salt等是不需要用户输入的,所以首先必须在view中去掉这些部分;由于注册的时候需要用户重复密码以及为了防止恶意注册采取了验证码,必须在view中添加这两个字段。
打开\icampus\sns\protected\modules\access\views\accessUser文件夹中register.php
[php] <div class="row">
<?php echo $form->labelEx($model,’name’); ?>
<?php echo $form->textField($model,’name’); ?>
<?php echo $form->error($model,’name’); ?>
</div>
<div class="row">
<?php echo $form->labelEx($model,’password’); ?>
<?php echo $form->passwordField($model,’password’); ?>
<?php echo $form->error($model,’password’); ?>
</div>
<div class="row">
<?php echo $form->labelEx($model,’passwordConfirm’); ?>
<?php echo $form->passwordField($model,’passwordConfirm’); ?>
<?php echo $form->error($model,’passwordConfirm’); ?>
</div>
<div class="row">
<?php echo $form->labelEx($model,’verifyCode’); ?>
<?php echo $form->textField($model,’verifyCode’); ?>
<?php echo $form->error($model,’verifyCode’); ?>
</div>
<div class="row">
<?php $this->widget(‘CCaptcha’); ?>
</div>[/php]
可以看到每一个字段都是写在一个div里的,可以很方便的让我删除或者添加,div组中的
form->labelEx表示要显示的说明文字;
form->passwordField表示采取的格式;
form->error表示错误提示;
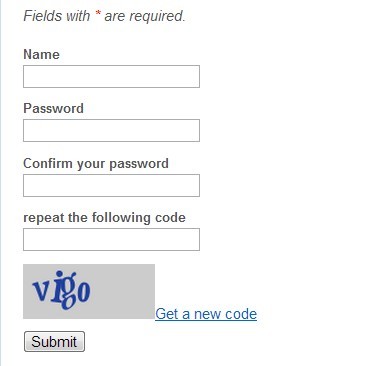
从上面代码可以看到,我们保留的字段有name,password,passwordConfirm,以及verifyCode。其中密码输入框不能明文显示,所以采用form->passwordField形式;用户名与验证码输入框需要明文显示,所以我们采用form->textField形式。
最后三行即是显示验证码图片。
效果图如下图所示。
由于刚才我们删除了一些字段显示,又添加了一些字段显示。所以需要作一些逻辑修改。
1. 打开icampus\sns\protected\modules\access\models文件下下的AccessUser.php,首先添加两个public字段,如果不声明为public,会导致访问出错。
[php]
public $passwordConfirm;
public $verifyCode;
[/php]
2. 修改下面这个函数,将上述两个字段在要求用户输入的时候,需要显示的说明文字写上去。比如需要用户重复输入密码的时候,我希望显示的提示信息是“Confirm your password”
[php]
/**
* @return array customized attribute labels (name=>label)
*/
public function attributeLabels()
{
return array(
‘id’ => ‘ID’,
‘name’ => ‘Name’,
‘password’ => ‘Password’,
‘lastlogin’ => ‘Lastlogin’,
‘passwordConfirm’ => ‘Confirm your password’,
‘verifyCode’ => ‘repeat the following code’,
‘salt’ => ‘Salt’,
);
}
[/php]
3. 修改下面的函数,添加规则。由于两次密码必须一致,所以给passwordConfirm添加一条验证规则(即下面代码中的13行),验证码也需要添加规则(下面代码中的15行)。
[php]
/**
* @return array validation rules for model attributes.
*/
public function rules()
{
// NOTE: you should only define rules for those attributes that
// will receive user inputs.
return array(
array(‘name, password, salt’, ‘length’, ‘max’=>255),
array(‘lastlogin’, ‘safe’),
//the "passwordConfirm" shoud be equal to the "password"
array(‘passwordConfirm’, ‘compare’, ‘compareAttribute’=>’password’),
//the verifyCode
array(‘verifyCode’, ‘captcha’, ‘on’=>’register’, ‘allowEmpty’=>!extension_loaded(‘gd’)),
// The following rule is used by search().
// Please remove those attributes that should not be searched.
array(‘id, name, password, lastlogin, salt’, ‘safe’, ‘on’=>’search’),
);
}
[/php]
4. 如果需要,重写beforeSave()函数。因为注册的时候,需要作给密码加密等操作,所以我重写了beforeSave()函数
[php]/**
* Author: HuKeping
* Date: 2013-4-1 22:08:00
* Brief: override the super beforeSave() function to do some thing before save the record to database.
* salt is a unix timestamp by the time of the very moment.
* password is encoded by md5 and then attached with the md5ed salt string and md5 the new string again.
* lastlogin is initialized with the time of the very moment.
* set the timezone to PRC is to make the timezone correct.
*
*/
public function beforeSave()
{
if($this->isNewRecord)
{
$salt = time(); //get the unix timestamp here
date_default_timezone_set(‘PRC’); //set the timezone to PRC
$this->lastlogin = date(‘Y-m-d H:i:s’, time()); //the timestamp in mysql is not the same with it in php
$salt = md5($salt); //encode the salt by md5
$password = md5(md5($this->password) . $salt); //md5 again
$this->password = $password; //set the password
$this->salt = $salt; //set the salt
}
else
{
return false;
}
return parent::beforeSave();
}[/php]
注意1:如果没有出错,一定要返回true,否则记录不会插入数据库
注意2:最好在验证以后,保存之前,在beforeSave()里进行所需要的编码(如md5加密)等操作,否则有可能会验证出错(比如密码与md5过后的密码比较),导致save()操作失败。
需要在controller中添加访问规则以及action等。打开\icampus\sns\protected\modules\access\controllers文件夹下AccessUserController.php
1. 在下面的函数中,把‘register’以及启用验证码‘captcha’添加进所有用户的权限中

2. 为了使用验证码,需要添加一个action,如下图所示
[php]
/**
*
* Author: HuKeping
* Date: 2013-4-1 15:48:22
* Brief: add the verification action
* minLength is the mininum number of characters that used to as the verify code
* maxLength is the maximum number of characters that used to as the veryfy code
* when minLength == maxLength, the number of bytes is set, otherwise it’s random.
*/
public function actions()
{
return array(
‘captcha’=>array(
‘class’ => ‘CCaptchaAction’,
‘backColor’ => 0xCCCCCC,
‘minLength’ => 4,
‘maxLength’ => 4,
),
);
}
[/php]
其中数组中的各个参数已经在注释中写明。
3. 修改自动生成的actionRegister函数,如下图所示
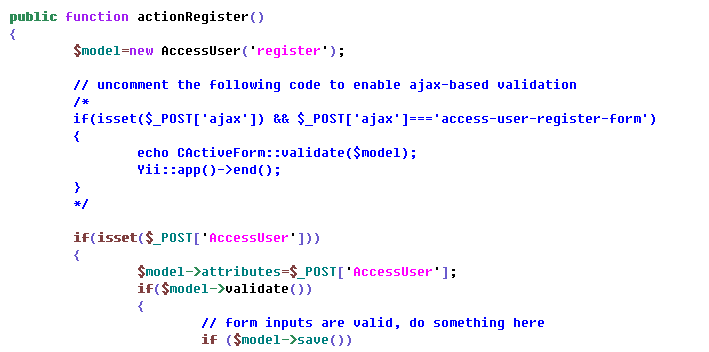
至少添加最后一句 $model->save(),即更新数据库。执行这一句之前,框架会自动执行刚才写的beforeSave()。执行完save()以后,整个注册流程也到此结束。
总的来说,流程就是
- gii自动生成模块
- 根据需求修改视图
- 根据视图修改逻辑
- 修改权限、规则等。
well done~~
test,好样的~~
大学姐:)
怎么留言~~~~~~~~~~~~~~~~~~~
那你在干嘛。。
吼吼~~
为什么没有变?
我看到已经有了。。
用户名可以重复?
指哪个?